Showing posts with label vegetable. Show all posts

Sunday, September 6, 2026

Butternut Squash Soup - Pantry-Friendly

I love a good soup!  And soups that are at-the-ready because they use pantry-friendly ingredients are so convenient, too.

This recipe has a unique ingredient for shelf-stable butternut squash, too!

BUTTERNUT SQUASH SOUP (PF)

PREP TIME:  5 minutes
COOK TIME:  15 minutes

INGREDIENTS
  • 4 c. chicken broth (or vegetable broth)
  • 4 4-oz. jars butternut squash baby food
  • 1-2 Tbsp. dried minced onions
  • 2 tsp. dried parsley
  • 1/2 tsp. salt
  • 1/2 tsp. garlic powder
  • 1/4 tsp. savory
  • 1/4 tsp. rosemary
  • 1/8-1/4 tsp. nutmeg
  • 1 c. whole milk (I like Parmalat or the individual 8-oz. bottles by Better Goods as shelf-stable options)
NOTE:  This is a thin, drinkable soup.  If you'd like a thicker soup, melt 3 Tbsp. butter-flavor shortening (the pantry-friendly version of butter) in the pot and whisk it with 3 Tbsp. flour, cooking until it thickens, then slowly whisk in the broth.  Follow the rest of the directions as shown.

DIRECTIONS
In a large soup pot, combine all ingredients and heat over medium heat 5 minutes, stirring periodically.  Lower heat to low and cover with a lid, heating for 10 more minutes to allow onions to soften and flavors to meld.

Try this recipe, then comment and let me know how you like it!  And Pin it to Pinterest to save and share using the image below.


Wednesday, June 17, 2026

Pantry-Friendly Salad Dress-Ups

Vegetables are delicious if you know what to do with them.  If you get bored with vegetables or don't know how to add more to your diet, the I think the key is variety!  

Today I'm going to share with you a few ways to dress up a salad.  If you want to eat a salad for lunch more often than you do:  the key is variety.  Switch it up.  Play around.  Variety.  The Salad Dress-Ups I'm sharing with you today are all pantry-friendly, even though the salad part would obviously need to be fresh.

I've loved salad as long as I can remember.  When I was little, my family only went out to dinner on birthdays, and the birthday kid could pick wherever they wanted to go.  I only had this chance ONCE a year, and I picked the same restaurant every.single.time because it had an all-you-can-eat salad bar.  And I think that's the key to loving salad (and maybe especially getting a little kid to love salad): variety.  I loved that I could build my own salad, make it different every time, and add so many different things for different flavors.

a super awesome picture of me at 7 years old 

And here's a funny secret.  I really don't like lettuce.  And maybe that's why I loved (and still do) a salad bar.  I get enough lettuce to call it a salad and then fill it with things I do love like tomatoes and cucumbers and olives.

This recipe is a little bit different than most of the recipes you'll see here at Easy Pantry Recipes because this one does require some fresh ingredients such as lettuce.  However, most of the ingredients are things you can keep in your pantry and pull out any time to dress up a salad.

For this recipe, I will be listing fresh ingredients in italics and pantry-friendly ingredients in regular text.   Ingredients are listed in 5 parts, and the key here is to mix and match whatever you like, doing it the same or different every time.  So, let's go!

PANTRY-FRIENDLY SALAD DRESS-UPS

PREP TIME:  5 or 10 minutes or something
COOK TIME:  none

INGREDIENTS, PART 1:  the greens

  • lettuce such as green leaf, butter, red leaf, romaine, iceberg, etc.
  • spring mix
  • spinach

INGREDIENTS, PART 2:  vegetables, in bite-size pieces

  • tomatoes (fresh or canned, drained)
  • cucumbers
  • shredded carrots
  • peas (fresh, frozen/thawed, or freeze-dried for a nice crunch)
  • avocado
  • broccoli
  • cauliflower
  • olives
  • any other vegetables you like

INGREDIENTS, PART 3:  protein

  • shredded cheese (fresh, or my favorite: freeze-dried cheese.  It's delicious dry straight out of the can!  Leave it that way for a crunch in your salad, or rehydrate it.)
  • beans (canned/rinsed/drained, such as chick peas, black beans, pinto beans, black-eyed peas, etc.)
  • meat (such as chopped lunch meat or canned chicken rinsed and drained or rehydrated freeze-dried chicken)
  • boiled eggs
  • nuts such as almond slices or chopped pecans

INGREDIENTS, PART 4:  the crunch (great way to dress up a salad!)

INGREDIENTS, PART 5:  dressing (pantry-friendly until you open them, then they need refrigeration)

  • lemon or lime juice
  • bottled dressing such as ranch, blue cheese, Italian, Greek, or any favorite dressing
DIRECTIONS
Pile your salad high with your favorite greens, vegetables, and proteins, then top with crunch and dressing. 

Try this recipe, then comment and let me know how you like it!  And Pin it to Pinterest to save and share using the image below.

Save and share this recipe by Pinning this image to Pinterest.

To print this recipe, hit the "print" button below.  If you don't see the print button, scroll back up and click on the title of this blog post, then scroll back down and you'll find the button below.

Monday, March 30, 2026

Pantry Pizza Soup

I started this blog in March 2020.

Yes, THAT March 2020.

The shelves at the store were eerily empty.  Yeast.  Pasta.  Chicken.  Gone.  I had been a fan of freeze-dried food and putting aside a little extra canned goods for a long time.  Just in case.  Because you never know when you'll be snowed in or even just sick for a week and not able to get to the grocery store.   Or, -ahem- when you forgot to get something for the potluck. 

It's been 6 years now (wow, really?!) since I started collecting--and, most of the time, adjusting--recipes that use only ingredients that can be kept in the pantry.  Nothing refrigerated or fresh, or even frozen.  

So I'm excited this month to bring you another pantry-friendly soup recipe.  This time:  Pizza Soup!  We really love this at our house.  (If you want to substitute any of the freeze-dried ingredients for fresh, that's also an option.)  

PANTRY PIZZA SOUP

PREP TIME:  5-10 minutes
COOK TIME:  30-40 minutes

INGREDIENTS
  • 5 c. water
  • 14 oz. jar pizza sauce
  • 1/3 c. dried minced onion
  • 4 oz. can mushroom pieces, drained
  • 14 oz. can petite diced Italian tomatoes
  • 3 c. tomato juice
  • 1/2 c. freeze-dried sausage (available here or here, etc.)
  • 2 tsp. dried parsley
  • 1 tsp. dried rosemary
  • 1 tsp. dried oregano
  • 2 tsp. freeze-dried garlic (I like Litehouse, or substitute 1 tsp. garlic powder)
  • 1/2 c. small pasta (I used mini farfalle here, but whatever you have is fine)
  • about 1-2 c. freeze-dried shredded mozzarella cheese, rehydrated according to package directions (available here or here, etc.)
DIRECTIONS
Rehydrate cheese according to package directions.  Heat all ingredients except pasta and cheese in a pot over low heat for 15 minutes.  (This allows the flavors to blend and the sausage to re-hydrate.)  Then bring to a boil over high heat.  When the soup boils, add the pasta and cook 8-11 minutes, according to package directions for that type of pasta.  Return to low to simmer a few minutes before serving.  Sprinkle soup in bowls with mozzarella cheese. 

Try this recipe, then comment and let me know how you like it!  And Pin it to Pinterest to save and share using the image below.


Hooray!  This post was a featured favorite at:


Tuesday, September 16, 2025

Freeze-Dried Chicken Vegetable Ramen

Something I really love about the pantry-friendly recipes I share here is that they can be whipped up without a run to the store!  Everything is already on-hand.  And that goes for this Freeze-Dried Chicken Vegetable Ramen recipe, too.

In this recipe, you'll notice some options listed for amounts.  If you like a saucier dish, use the larger amounts. 

The whole thing comes together in 20 minutes, too, so if you want something convenient AND fast, this recipe is for you! 

FREEZE-DRIED CHICKEN VEGETABLE RAMEN

PREP TIME:  20 minutes
COOK TIME:  included

INGREDIENTS

DIRECTIONS
In a large bowl with a lid, combine the chicken, carrots, celery, green onion, and broccoli.  Pour 4 c. boiling water over, then stir to ensure each piece is wet.  Cover with a lid and leave for 20 minutes.

Meanwhile, in a large serving bowl, combine the sesame oil, teriyaki sauce, soy sauce, orange marmalade, and the flavor packets from the ramen noodles.

About 8 minutes before the chicken-vegetable bowl is finished re-hydrating, cook the ramen according to package directions.  Drain ramen and add it with the contents of the chicken-vegetable bowl to the serving bowl with the sauce in it.  Stir to combine well and serve hot.


Try this recipe, then comment and let me know how you like it!  And Pin it to Pinterest to save and share using the image below.

Save and share this recipe by Pinning this image to Pinterest.

To print this recipe, hit the "print" button below.  If you don't see the print button, scroll back up and click on the title of this blog post, then scroll back down and you'll find the button below.

Hooray!  This blog post was a featured favorite here:

Sunday, March 30, 2025

Sneaky Vegetable Tortellini

If you have littles who don't like vegetables, this Sneaky Vegetable Tortellini is a great way to get a few vegetables in without anyone noticing.    

Better still, this dish is pantry-friendly so all the ingredients can be kept on hand for a convenient last-minute dish or even in case of emergency.  But I do suggest hiding the "sneaky" ingredient in your pantry, out of sight, just in case.  When my kids were little and I made this recipe, one of them discovered the sneaky ingredient and I had to stop.  ha ha

That said, I now have three grown children who like vegetables and whose taste buds are open-minded.

This sneaky ingredient is simply pureed vegetables, but in an unlikely form.

SNEAKY VEGETABLE TORTELLINI

PREP TIME:  3 minutes
COOK TIME:  15 minutes

INGREDIENTS
  • 12 oz. box dry tortellini (I personally like the cheese and spinach version; if not making this a pantry-friendly meal, you can substitute with refrigerated tortellini or ravioli if you like)
  • The Sneaky Ingredient:  a 4-oz. package or jar of vegetable baby food such as carrots or peas, or consider combinations like carrot-sweet potato or pea-carrot-spinach.
  • 1 tsp. Italian seasoning
  • 1 24-oz. jar of spaghetti or marinara sauce
  • parmesan cheese (optional)
DIRECTIONS
Cook tortellini according to package directions.  Drain.  In the same pot, stir the spaghetti sauce, Italian seasoning, and "pureed vegetables" (baby food) together over medium heat until combined.  Add the cooked, drained tortellini.  Stir until heated through. Sprinkle with parmesan cheese if desired.

Try this recipe, then comment and let me know how you like it!  And Pin it to Pinterest to save and share using the image below.

Save and share this recipe by Pinning this image to Pinterest.

To print this recipe, hit the "print" button below.  If you don't see the print button, scroll back up and click on the title of this blog post, then scroll back down and you'll find the button below.

Hooray!  This blog post was a featured favorite here:


Thursday, February 1, 2024

Loaded Baked Potato Soup - Mug Recipe (plus a gift idea!)

Mug Recipes are such a handy thing to have!  If you've never heard of Mug Recipes, they're probably just what you think they are:  single-serve recipes you can make right in a mug!  As an extra bonus, they take 5 minutes or less to make.

Today I'll share with you a really quick and easy lunch Mug Recipe, and you'll get a great bonus at the end of this post, too, that is a fun and unique gift idea!!

As with all the recipes here at Easy Pantry Recipes, this potato soup recipe can be made with shelf-stable (pantry-friendly) ingredients, which means you can have these ingredients always on hand.  

LOADED BAKED POTATO SOUP IN A MUG

PREP TIME:  2 minutes
COOK TIME:  3 minutes

INGREDIENTS


DIRECTIONS
Microwave the chicken broth in a large mug for 2 minutes or until boiling.  Whisk in milk, potato flakes, and garlic powder until smooth.  Microwave 45 seconds.  Add toppings as desired.

That's it!  It's a quick and easy lunch. 

AND A FUN GIFT IDEA 
with an awesome bonus:

A couple of years ago, I decided that putting this recipe right on a 15-oz. mug would make such a fun gift idea!  This microwavable mug is big enough to stir the ingredients and then eat from.  I created the mug using Artisan digital scrapbooking software, then submitted it for professional printing at the Forever Print Shop.  

I love how it turned out!


I've made this mug available for ordering, so if you think this would make a great gift idea, too, it's easy to do.  (You will love the price!)  

All you need to do is find the mug at this link and then click the "add to cart" button above it.  (If there's a current sale, the sale price will be shown.)  You'll then be prompted to open a (free) Forever account, and *you will receive a $20 coupon after you verify your email address, which you can use toward this mug (or even two!).

What a great bonus to get this mug *free, right?!

*Forever offers $20 coupons to new users.

Try this recipe, then comment and let me know how you like it in the comments!  And Pin it to Pinterest to save and share using the image below.


To print this recipe, hit the "print" button below.  If you don't see the print button, scroll back up and click on the title of this blog post, then scroll back down and you'll find the button below.

Hooray!  This blog post was a featured favorite here:

Friday, March 4, 2022

Tuscan Pesto Soup

I love a good soup in the winter, and this one is absolutely full of goodness.  Vegetables, beans, and even wheat berries (read their health benefits here) combine with Italian seasonings and pesto for a delicious, hearty soup.  

Better still, this soup is pantry-friendly, so all the ingredients can be kept on hand for a convenient last-minute dish or even in case of emergency.

TUSCAN PESTO SOUP

PREP TIME:  10-15 minutes
COOK TIME:  50 minutes

INGREDIENTS
  • 4 c. water
  • 4 c. chicken broth
  • 1 tsp. basil
  • 2 tsp. Italian seasoning
  • 2/3 c. dry wheat berries  (Wheat berries are just wheat in whole grain form.  Find them in the bulk foods section of a health food store, or order online here or here or here.)
  • 1/4 c. dried minced onion
  • 1/2 c. freeze-dried spinach (optional, but it's so good)
  • 2 Tbsp. pesto
  • 8 oz. can carrot slices, drained
  • 2 cans Italian diced tomatoes, undrained
  • 2 cans navy beans, rinsed and drained
DIRECTIONS
Place water, chicken broth, basil, Italian seasoning, wheat, onion, and spinach in a large soup pot.  Bring to a boil over high heat.  Boil for 5 minutes.  Cover and reduce heat to low.  Simmer for 45 minutes.  Stir in pesto, carrots, tomatoes, and beans, then heat through over medium heat about 5 minutes.

Try this recipe, then comment and let me know how you like it!  And Pin it to Pinterest to save and share using the image below.

To print this recipe, hit the "print" button below.  If you don't see the print button, scroll back up and click on the title of this blog post, then scroll back down and you'll find the button below.

Hooray!  This blog post was a featured favorite here:


Friday, November 5, 2021

Thanksgiving Dinner Casserole (jar mix)

In my quest to find some great meals in a jar, I came across an awesome idea for turkey and stuffing in a jar from Rainy Day Food Storage.  It's more of a casserole, in my opinion, and since it includes cranberries and even gravy right in the mix, I think the best name for this recipe is Thanksgiving Dinner Casserole.  It has such a homey, comfort-food flavor.  And it smells like Thanksgiving.

Isn't this the most amazing idea to send to college students, those in the military, or others who are away from home at Thanksgiving?  

I absolutely love the idea of giving a meal in a jar, too, because it's a little like preparing someone a home-cooked meal when it's not possible for me to actually do it.  What a perfect gift!

Plus, these are easy to make ahead for yourself, too.  Pull out a jar for a quick meal or a quick treat, or even in an emergency. 

IMPORTANT NOTES ABOUT THIS JAR MIX:  
  • Jar mixes should be used within about a year unless you seal them (like with a FoodSaver and the jar attachment) or use oxygen absorbers.  
  • You can purchase many of the ingredients for this recipe at your local grocery store.  
  • You can purchase the dehydrated (or freeze-dried) ingredients at Thrive Life (where I get a little discount if you do) or at Honeyville or at Augason Farms, OR you can dry them yourself using a food dehydrator.  That link is to the dehydrator I use--I love it, but I know there are fancier ones out there, too. I dried the carrots and the celery for this recipe myself, and I was amazed at how easy it was and how well the flavor was preserved.
  • If you decide to gift this the way I have pictured, use a piece of fabric about 6"x6".
THANKSGIVING DINNER CASSEROLE

PREP TIME (making the jar mix):  10 minutes
COOK TIME:  30-35 minutes

Obviously, this photo was taken pre-renaming:
Thanksgiving Dinner Casserole

JAR MIX INGREDIENTS
In a wide-mouth quart jar, layer in order, tamping down to help the ingredients settle (as needed):
  • 1 c. freeze-dried turkey (only available here, to my knowledge; may substitute freeze-dried chicken from here where I get a referral discount or here, if preferred)
  • 1 packet chicken gravy mix, dry
  • 1 tsp. poultry seasoning
  • 1  1/2 c. seasoned stove-top stuffing
  • 1/4 c. dehydrated carrots (available here where I get a referral discount, or here or here, or you can dry your own with a food dehydrator
  • 1/4 c. dehydrated celery (available here where I get a referral discount, or here or here, or you can dry your own with a food dehydrator
  • 1/4 c. dried onion 
  • 1/4 c. dried cranberries
See updated directions below.

COOKING DIRECTIONS
Attach to the jar using a sticker or tag:
In a medium pot, bring 4 cups of water to a boil.  Stir in the contents of the jar.  Remove from heat and let sit, covered, for 10 minutes.  Return to heat, uncovered, and simmer about 20 minutes, stirring periodically.  

See?  Thanksgiving Dinner Casserole from a Jar.  :)

Try this recipe, then comment and let me know how you like it!  And Pin it to Pinterest to save and share using the image below.


To print this recipe, hit the "print" button below.  If you don't see the print button, scroll back up and click on the title of this blog post, then scroll back down and you'll find the button below.

Hooray!  This blog post was a featured favorite here:


Friday, September 3, 2021

Vegetable Legume Soup (jar mix)

Can you believe a soup with zucchini, cauliflower, and peas that's pantry-friendly?  It's got hearty black-eyed peas and lentils, too.  Combine it with a slice of Rosemary Olive Oil Bread or Soft Two-and-a-Half-Hour Whole Wheat Bread, and you've got a perfect little meal!

As I mentioned in May, I'll be sharing jar mixes each month from now (May, really) through December to give you some great ideas for gift-giving to neighbors and friends.  I love the idea of giving a meal in a jar because it's such a time-saver for the recipient during a busy time of year.  I have had more than one friend tell me how perfect the meal in a jar was!

Plus, these are easy to make ahead for yourself, too.  Pull out a jar for a quick meal or a quick treat, or even in an emergency. 

IMPORTANT NOTES ABOUT THIS JAR MIX:  
  • Jar mixes should be used within about a year unless you seal them (like with a FoodSaver and the jar attachment) or use oxygen absorbers.  
  • You can purchase many of the ingredients in this Vegetable Legume Soup at your local grocery store.  
  • You can purchase the dehydrated (or freeze-dried) ingredients at Thrive Life (where I get a little discount if you do) or at Honeyville or at Augason Farms, OR you can dry them yourself using a food dehydrator.  That link is to the dehydrator I use--I love it, but I know there are fancier ones out there, too. 
  • If you decide to gift this the way I have pictured, use a piece of fabric about 6"x6".
VEGETABLE LEGUME SOUP

PREP TIME (making the jar mix):  10 minutes
COOK TIME:  45 minutes


JAR MIX INGREDIENTS
In a wide-mouth quart jar, layer in order, tamping down to help the ingredients settle (as needed):
  • 1 c. dried zucchini (See notes above for purchase options for the freeze-dried and dehydrated ingredients.)
  • 3/4 c. dried cauliflower
  • 1/2 c. dried peas
  • 1 tsp. onion powder
  • 1/2 tsp. garlic salt
  • 1 tsp. parsley
  • 1/2 tsp. thyme
  • 2 Tbsp. tomato bouillon (like this--I find it in the Mexican aisle of my local grocery store; can substitute chicken bouillon if desired)
  • 1 tsp. oregano
In a small baggie, combine:
  • 1/2 c. black-eyed peas
  • 1/2 c. lentils
Place the baggie in the jar on top of the vegetables and spices.

Follow the updated directions below as well as
the correct layering order above.

COOKING DIRECTIONS
Attach to the jar using a sticker or tag:
Pour lentils and black-eyed peas from the baggie into a pot with 10 c. water.  Bring to a boil over high heat, then cover and simmer on low for 30 minutes.  Add all the vegetables and spices left in the jar and continue simmering 15 minutes.  


Try this recipe, then comment and let me know how you like it!  And Pin it to Pinterest to save and share using the image below.


To print this recipe, hit the "print" button below.  If you don't see the print button, scroll back up and click on the title of this blog post, then scroll back down and you'll find the button below.

Friday, August 6, 2021

Chicken Noodle Soup in a Jar

If summer doesn't feel like the best time for soup, stick with me!  This soup is something special.  It's pantry-friendly.  That means it's shelf-stable, so you can put together the mix now and eat it come fall!  Or gift it.  

Soups are one of my favorite meals to just pull out of the pantry and make.  And this one is a great one because it's something you can gift to someone else, too!

As I mentioned in May, I'll be sharing jar mixes each month from now (May, really) through December to give you some great ideas for gift-giving to neighbors and friends.  I love the idea of giving a meal in a jar because it's such a time-saver for the recipient during a busy time of year.  I have had more than one friend tell me how perfect the meal in a jar was!

Plus, these are easy to make ahead for yourself, too.  Pull out a jar for a quick meal or a quick treat, or even in an emergency. 

And, hey, this is also a great thing to have on hand to make IN 15 MINUTES! to take to a sick friend, too.  There's something healing about chicken noodle soup.

IMPORTANT NOTES ABOUT THIS JAR MIX:  
  • Jar mixes should be used within about a year unless you seal them (like with a FoodSaver and the jar attachment) or use oxygen absorbers.  
  • You can purchase many of the ingredients in this Chicken Noodle Soup at your local grocery store.  
  • You can purchase the dehydrated (or freeze-dried) ingredients at Thrive Life (where I get a little discount if you do) or at Honeyville or at Augason Farms, OR you can dry some of them yourself using a food dehydrator.  That link is to the dehydrator I use--I love it, but I know there are fancier ones out there, too. I dried my own celery and carrots for this recipe.  (And, to be honest, I can't believe how amazing they turned out!  They rehydrate just like fresh in this recipe.)
  • If you decide to gift this the way I have pictured, use a piece of fabric about 6"x6".
CHICKEN NOODLE SOUP


PREP TIME (making the jar mix):  10 minutes
COOK TIME:  15 minutes


JAR MIX INGREDIENTS
In a wide-mouth quart jar, layer in order, tamping down to help the ingredients settle (as needed):
  • 2 Tbsp. dried onion
  • 3 Tbsp. chicken bouillon
  • 1 Tbsp. parsley
  • 3 Tbsp. non-dairy creamer (coffee creamer)
  • 3 Tbsp. dehydrated celery (See notes above for purchase options for the freeze-dried and dehydrated ingredients in this recipe.)
  • 1/4 c. dehydrated carrots
  • 3/4 c. freeze-dried chicken
  • 2  1/2 - 3 c. wide egg noodles
See below for updated directions.

COOKING DIRECTIONS
Attach to the jar using a sticker or tag:
Bring 10 c. water to a boil over high heat.  Add jar mix, then lower heat to medium-high and cook, uncovered, for 15 minutes.  


Try this recipe, then comment and let me know how you like it!  And Pin it to Pinterest to save and share using the image below.


To print this recipe, hit the "print" button below.  If you don't see the print button, scroll back up and click on the title of this blog post, then scroll back down and you'll find the button below.

Hooray!  This blog post was a featured favorite here:
  
by Estelle from Homemade on a Weeknight

Friday, July 2, 2021

Hearty Breakfast in a Jar

Breakfast from a jar?  Yep!  In fact, this hearty breakfast is full of protein, too.  Make several jars to have on hand any time--whether during an emergency or just in a pinch--or do what I love to do:  gift it!  

As I mentioned in May, I'll be sharing jar mixes each month from now (May, really) through December to give you some great ideas for gift-giving to neighbors and friends.  I love the idea of giving a meal in a jar because it's such a time-saver for the recipient during a busy time of year.  I have had more than one friend tell me how perfect the meal in a jar was when trying to grab something quick for dinner!

Plus, these are easy to make ahead for yourself, too.  Pull out a jar for a quick meal or a quick treat (coming soon), or even in an emergency. 

This recipe is courtesy Chef Tess from Honeyville, though I did make a few slight adjustments.  You can get all the ingredients from Honeyville, and you'll find links in her original blog post there.  You can also get the ingredients here (where I get a little discount if you do).  

I appreciated that Chef Tess pointed out there in her blog post that sometimes when you buy cans of freeze-dried food, they can seem a little spendy, but when you really look at how many pounds of meat or how many dozen eggs are in the can, it makes a lot more sense!

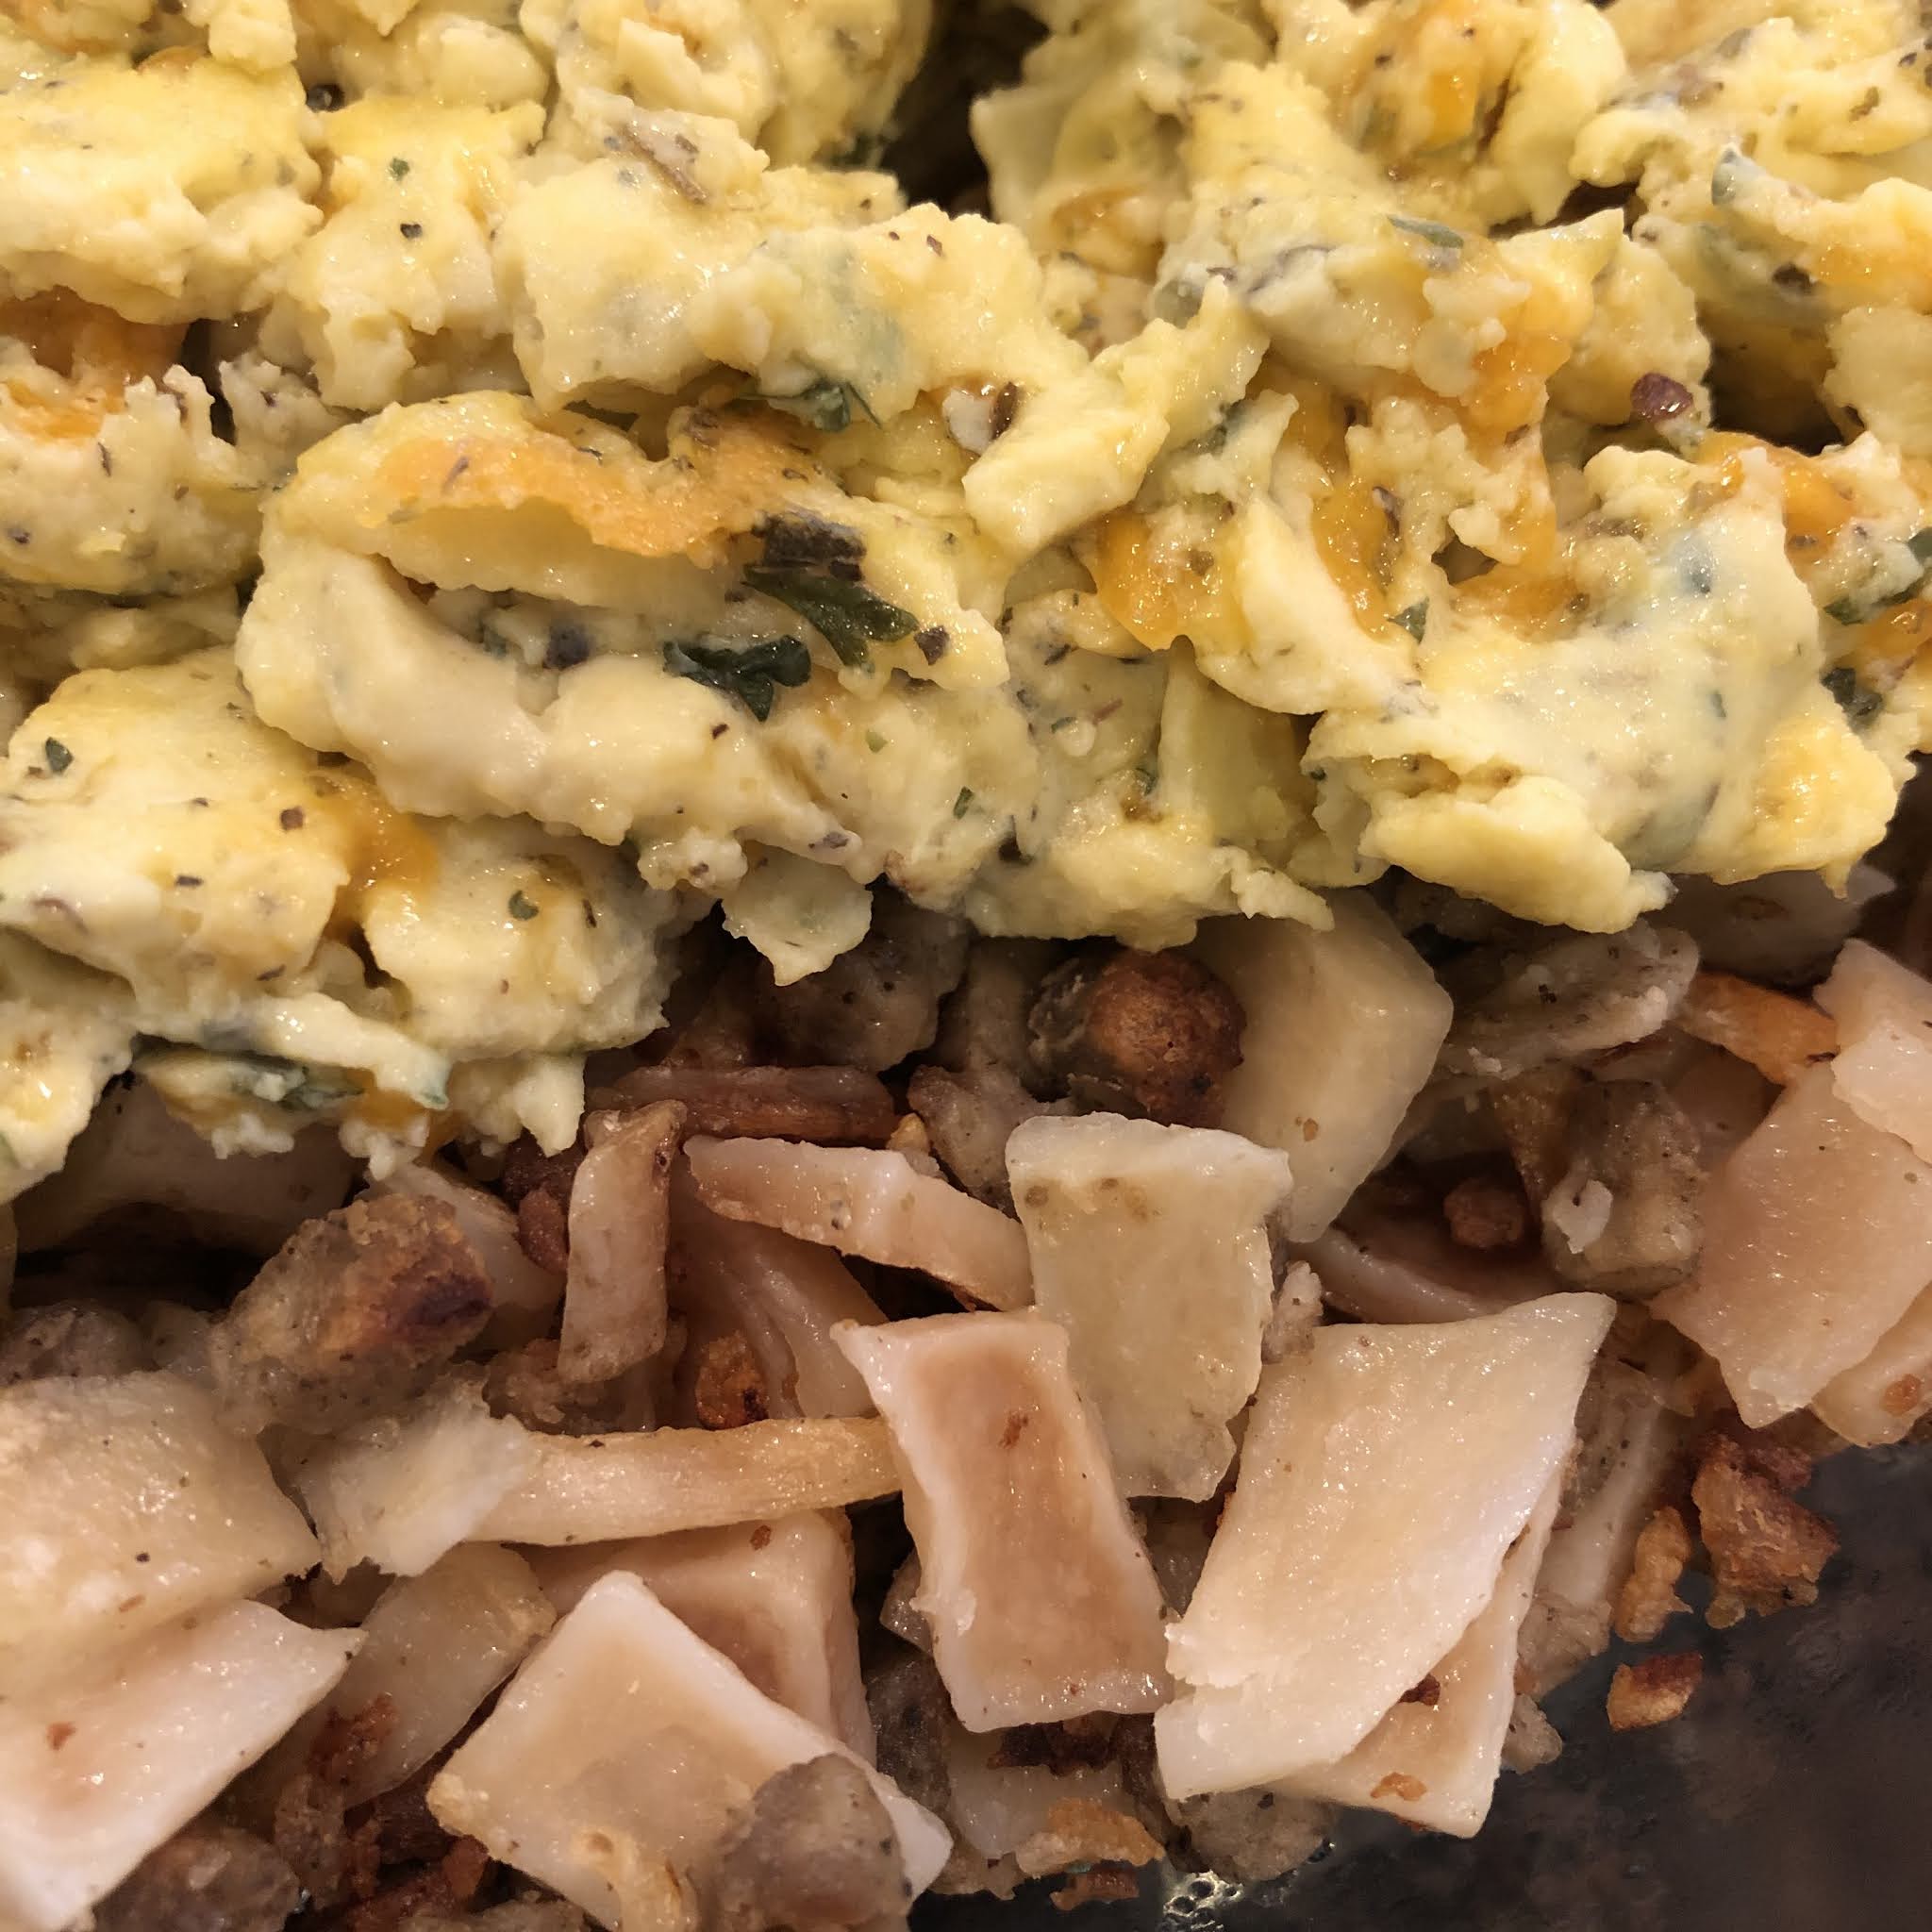
This was a delicious meal!  I'm so glad I tried it.  You'll notice in the photo below that the cooked eggs come out a little green with all the herbs added, but they're yummy.  And you might also notice that the little cooked sausage bits are hard to see among the potatoes (which look like meat, I think).  They're a little easier to recognize in the jar.

IMPORTANT NOTES ABOUT THIS JAR MIX:  
  • Jar mixes should be used within about a year unless you seal them (like with a FoodSaver and the jar attachment) or use oxygen absorbers.  
  • If you decide to gift this the way I have pictured, use a piece of fabric about 6"x6".
This is a really tasty and simple dish.  I really think this breakfast in a jar meal would make a perfect gift!

HEARTY BREAKFAST IN A JAR

PREP TIME (making the jar mix):  10 minutes
COOK TIME:  30 minutes


JAR MIX INGREDIENTS
In a wide-mouth quart jar, layer in order, tamping down to help the ingredients settle (as needed):
  • 2 c. dehydrated diced potatoes (see notes above for ingredient purchase options)
  • 1 c. freeze-dried sausage 
Then in a small baggie, combine:
  • 1/2 c. freeze-dried scrambled eggs
  • 1/3 c. freeze-dried cheddar cheese
  • 1 tsp. Italian seasoning
  • 1 tsp. parsley
  • 1/2 tsp. salt
Place the baggie in the jar on top of the potatoes and sausage.

Word to the wise: make sure your hole punch doesn't cut out the instructions.  ;)
Also, I updated the directions below, so be sure you use those instead of what you see above. 


COOKING DIRECTIONS
Attach to the jar using a sticker or tag:
Place potatoes and sausage in a large bowl.  Pour 4 c. boiling water over.  Cover to allow rehydration for 15 minutes.  Mix baggie contents with 3/4 c. cold water, whisking well.  Let sit at least 5 minutes.  Heat 1 Tbsp. oil in a large skillet over medium heat.  Drain potatoes and sausage, then place in the large skillet.  Cook for 5 minutes without stirring.  Cook 10 more minutes, stirring every 5 minutes.  Meanwhile, heat a small skillet over medium-low, then place egg-cheese mixture in.  Cook several minutes until done.  Serve eggs over the potato mixture.


Try this recipe, then comment and let me know how you like it!  And Pin it to Pinterest to save and share using the image below.


To print this recipe, hit the "print" button below.  If you don't see the print button, scroll back up and click on the title of this blog post, then scroll back down and you'll find the button below.

Hooray!  This blog post was a featured favorite here: